2/5/2021 - Senior Project Update 3
- Alex Kerns
- Feb 5, 2021
- 4 min read

One week of using my newly assembled microphone kit from microphone-parts.com, and my mic still sounds fantastic! I've been using it for some of my classes and to talk to my friends online, and I haven't had any issues yet. I'm in the process of compiling all my build footage into one concise video to showcase a little bit of what it looked like building this thing.
For this week's blog post, I wanted to share a little bit about some of the components that go into a microphone (specifically this one, the S-87), and attempt to explain how they work and/or contribute to the microphone. Most of my knowledge in regards to microphone components is about the microphone capsule:
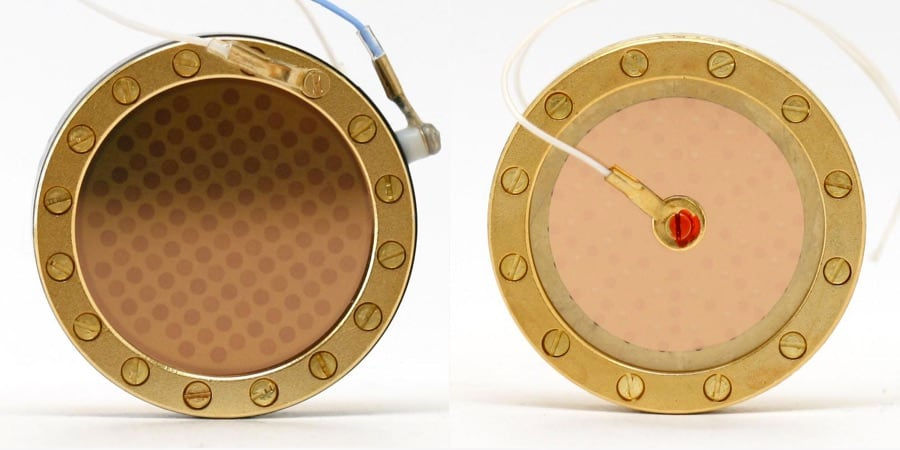
A microphone capsule is primarily made up of two important parts: The backplate, and the diaphragm. The diaphragm is a gold-coated membrane which moves closer and further away from the backplate at different speeds and intensities depending on the sound wave that is hitting it. I like to think about the diaphragm as where all the work happens. On the other hand, the backplate is there to serve as a frame of reference. If you know anything about basic circuitry, you probably know that ground is a term used to describe a spot in the circuit where the voltage returns to 0. In a microphone capsule, you can think of the backplate as the ground, and the diaphragm as the positive, or varying voltage. This varying voltage is exactly what makes a microphone capsule a transducer. If you'd like to learn more about microphone capsules, check out this article.
One of the most interesting and most crucial components to this microphone's circuit is called a Junction Field-Effect Transistor (or JFET for short).

JFETs are used heavily in audio for several reasons which I had not understood until I did this project. A JFET is a voltage-controlled unipolar semiconductor transistor which is a fancy way of saying it's a switch. It is a unique type of switch however, because this particular component uses a smaller outside voltage to control the flow of current going through and exiting the device; almost like how a person at a dam can open or close the floodgates to let more or less water out. But you may be wondering why this particular component is specifically used for audio, and the answer is simple: It's quiet. Sometimes it's hard to find stable electronic components, a key example being that most resistors have an accuracy tolerance no better than 5%. The less accurate a component is, the more likely it is that it will produce noise, and that's not good in terms of audio standards. The JFET is different from most because it is very sensitive, which also makes it very accurate. Most circuit designers use JFETs in amplifiers, because that's primarily what their ability is good for. My microphone has a small built-in amplifier, and that's precisely one of the reason's why the microphone requires 48 volts of phantom power! To find out more about the JFET's use in audio, try this article.
The last component of the S-87 microphone that I'd like to discuss is the potentiometer.

That big blue box may not look like much, but it certainly does a lot for this microphone circuit. Potentiometers are thus-named because they have the ability to change the electric potential in a circuit. They do so by moving an electrical contact up and down a resistant surface, creating more or less resistance the current needs to pass through. Most potentiometers have large knobs on them, like the ones you see on a mixing console. In this particular instance the potentiometer is way too small for that, not to mention how obnoxious it would be having a giant knob sticking out the front of your microphone (no offense, Blue's Yeti). The way they get around this issue is by using that tiny gold screw on the top of the pot. Once I had my circuit fully soldered and assembled, the instruction booklet had me check the voltage across the potentiometer. When I first hooked up my multimeter, it was reading around 55-ish volts. With several turns of the screw, I watched the number go up on my multimeter as I continued until it read an exact 60V. Microphone Parts' instructions make you do this step to insure that your microphone will output the right amount of signal once you plug it in and get it running. By changing the screw on the potentiometer, I was in turn changing the voltage in the internal amplifier which would then change the total signal output of the mic! Neat stuff, isn't it? Here's a good page about how potentiometers work.
That's all I have for this week, but there is sure more to come! Pretty soon, I'll have some reference recordings, some A/B recordings against the Neumann U87, and most likely some peer reviews. Stay tuned!


Comments